

Add Bolt buttons to your Shopify theme
Install the Bolt script in your Shopify theme and place Bolt buttons in the cart drawer, on the cart page, and on the product page.
Bolt renders its storefront button from one script and a few theme snippets. Selecting the button opens the Checkout Everywhere checkout link for the shopper's cart. You add the script and snippets in the Shopify code editor and the theme customizer. The file names and CSS classes below match Shopify's Dawn theme; other themes use different names.
Prerequisites
- Your store is connected to Bolt. See Connect Shopify to Bolt.
- The checkout link host and merchant ID that Bolt provides during onboarding.
- Shopify admin access that can edit theme code.
1. Prepare for installation
- Log in to the Merchant Dashboard, select Administration > API, and copy the Publishable Key.
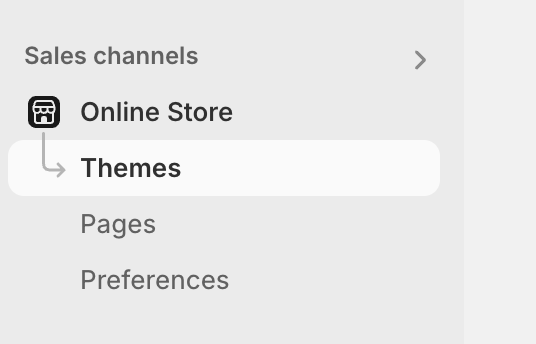
- In your Shopify admin, go to Online Store > Themes.
- Find your current theme, open the three dots menu, and select Edit code.
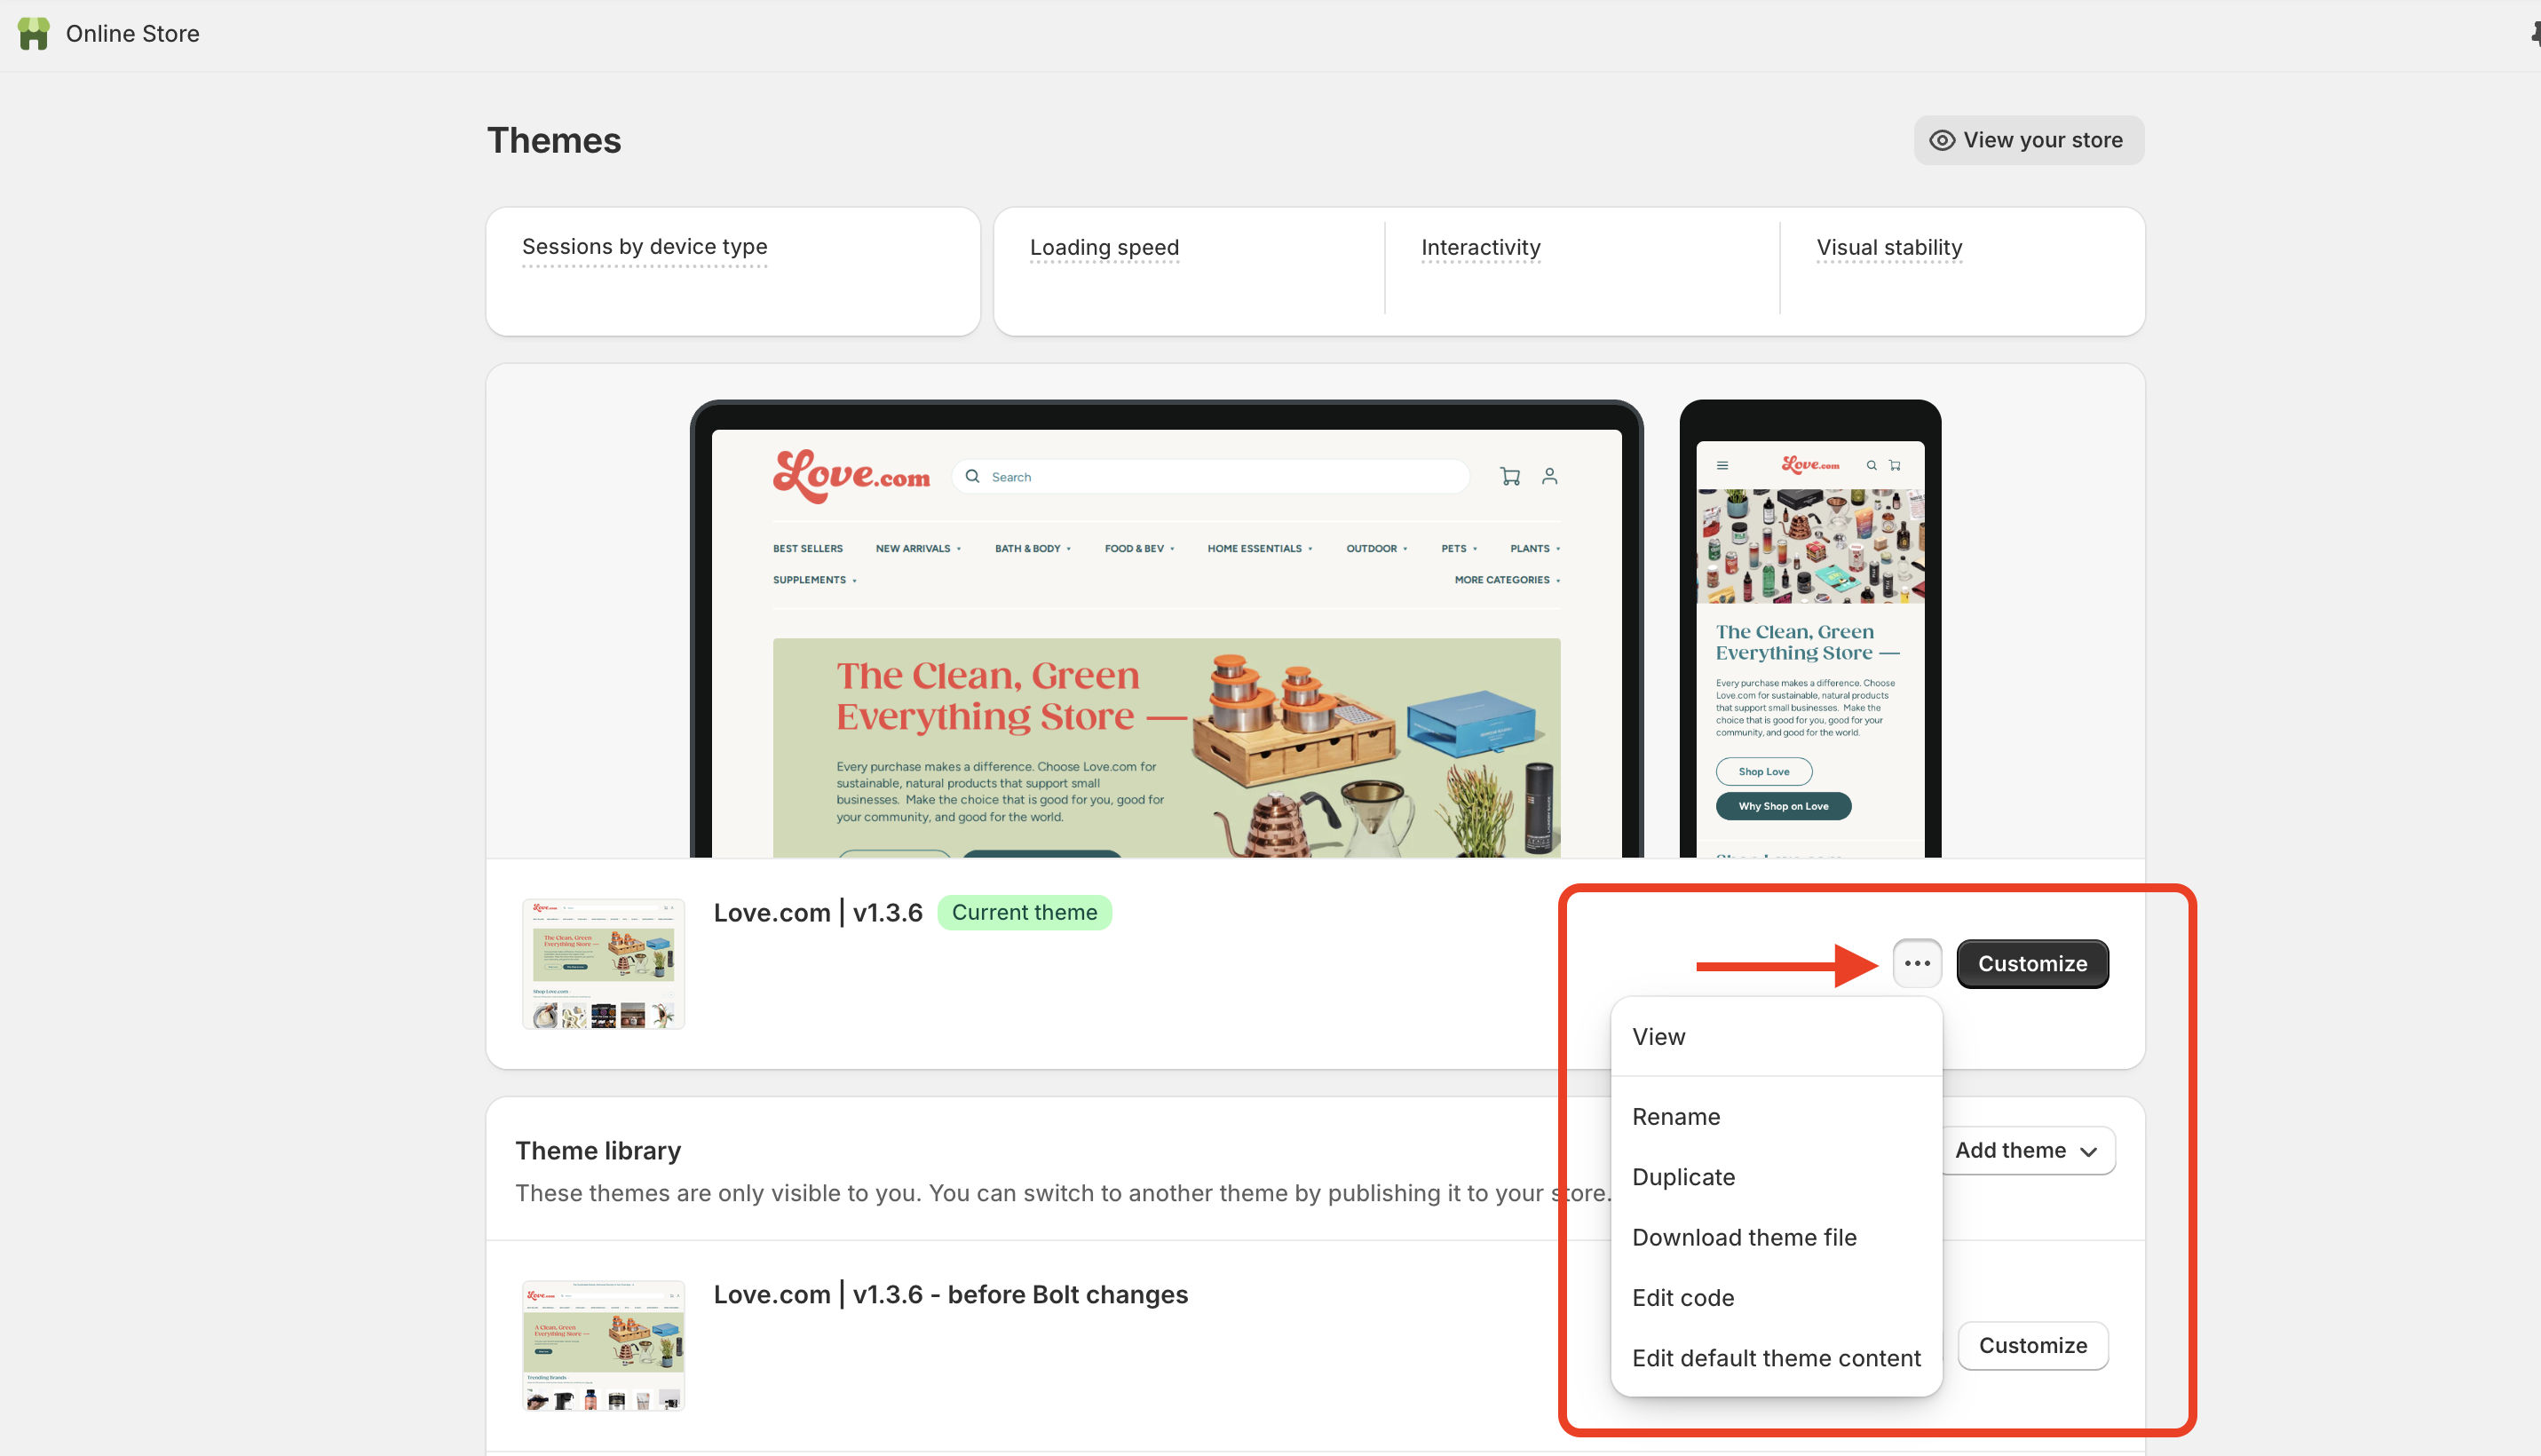
Expected result: The theme code editor opens with the Layout and Snippets folders in the sidebar.
2. Add code snippets
Create Bolt icon
Store the Bolt logo in a snippet so each button can render it.
- Under Snippets, select Add a new snippet.
- Name it
bolt-icon.liquidand paste:
<svg width="32" height="32" viewBox="0 0 490 500" fill="none" xmlns="http://www.w3.org/2000/svg">
  <g>
    <path d="M243.398 214.363V125.272H225.6
             C210.293 179.084 180.746 238.598 145.86 285.637
             H247.669V374.728H265.467
             C280.774 320.917 310.321 261.402 345.207 214.363
             H243.398Z" />
  </g>
</svg>
Install global scripts
- Open
layout/theme.liquid. - Paste the following inside the
<head>tag. Replace{PUBLISHABLE_KEY}with your publishable key, and{HOST}and{MERCHANT_ID}with the values Bolt provided during onboarding.
<link rel="stylesheet" href="https://c.boltapp.com/shopify/bolt-button.css">
<script
  src="https://c.boltapp.com/shopify/bolt-button.js?v="
  data-publishable-key="{PUBLISHABLE_KEY}"
  data-checkout-link-host="{HOST}.c.boltapp.com"
  data-merchant-id="{MERCHANT_ID}"
  defer="defer">
</script>- In the same file, add the following attribute to the
<body>tag. The script does not render buttons without it.
<body data-bolt-button-always-on="true" ... >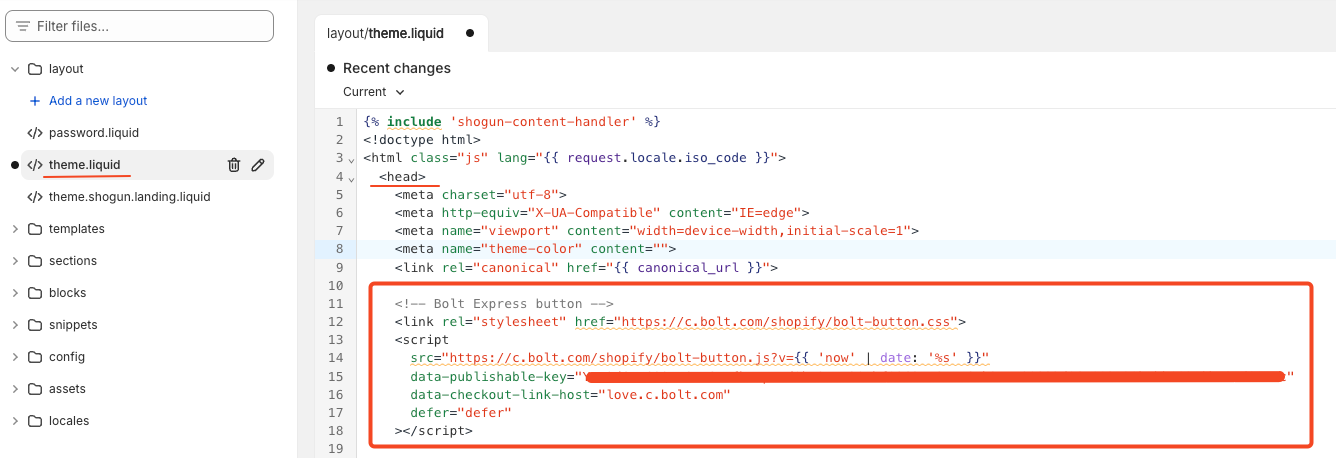
3. Add Bolt Checkout buttons
Place a button in the cart drawer and on the cart page. Search each file for class="cart__ctas" to find the existing checkout buttons.
Cart drawer snippet
<button data-bolt-buy-mode="cart-drawer" class="bolt-buy-button button button--full-width button--large">
  {% render 'bolt-icon' %}
  <span>Bolt Checkout</span>
</button>
Main cart page snippet
<button data-bolt-buy-mode="cart" class="bolt-buy-button button button--full-width button--large cart__checkout-button">
  {% render 'bolt-icon' %}
  <span>Bolt Checkout</span>
</button>
Product page checkout button
Add the product page button in the theme customizer.
- Go to Themes > Customize.
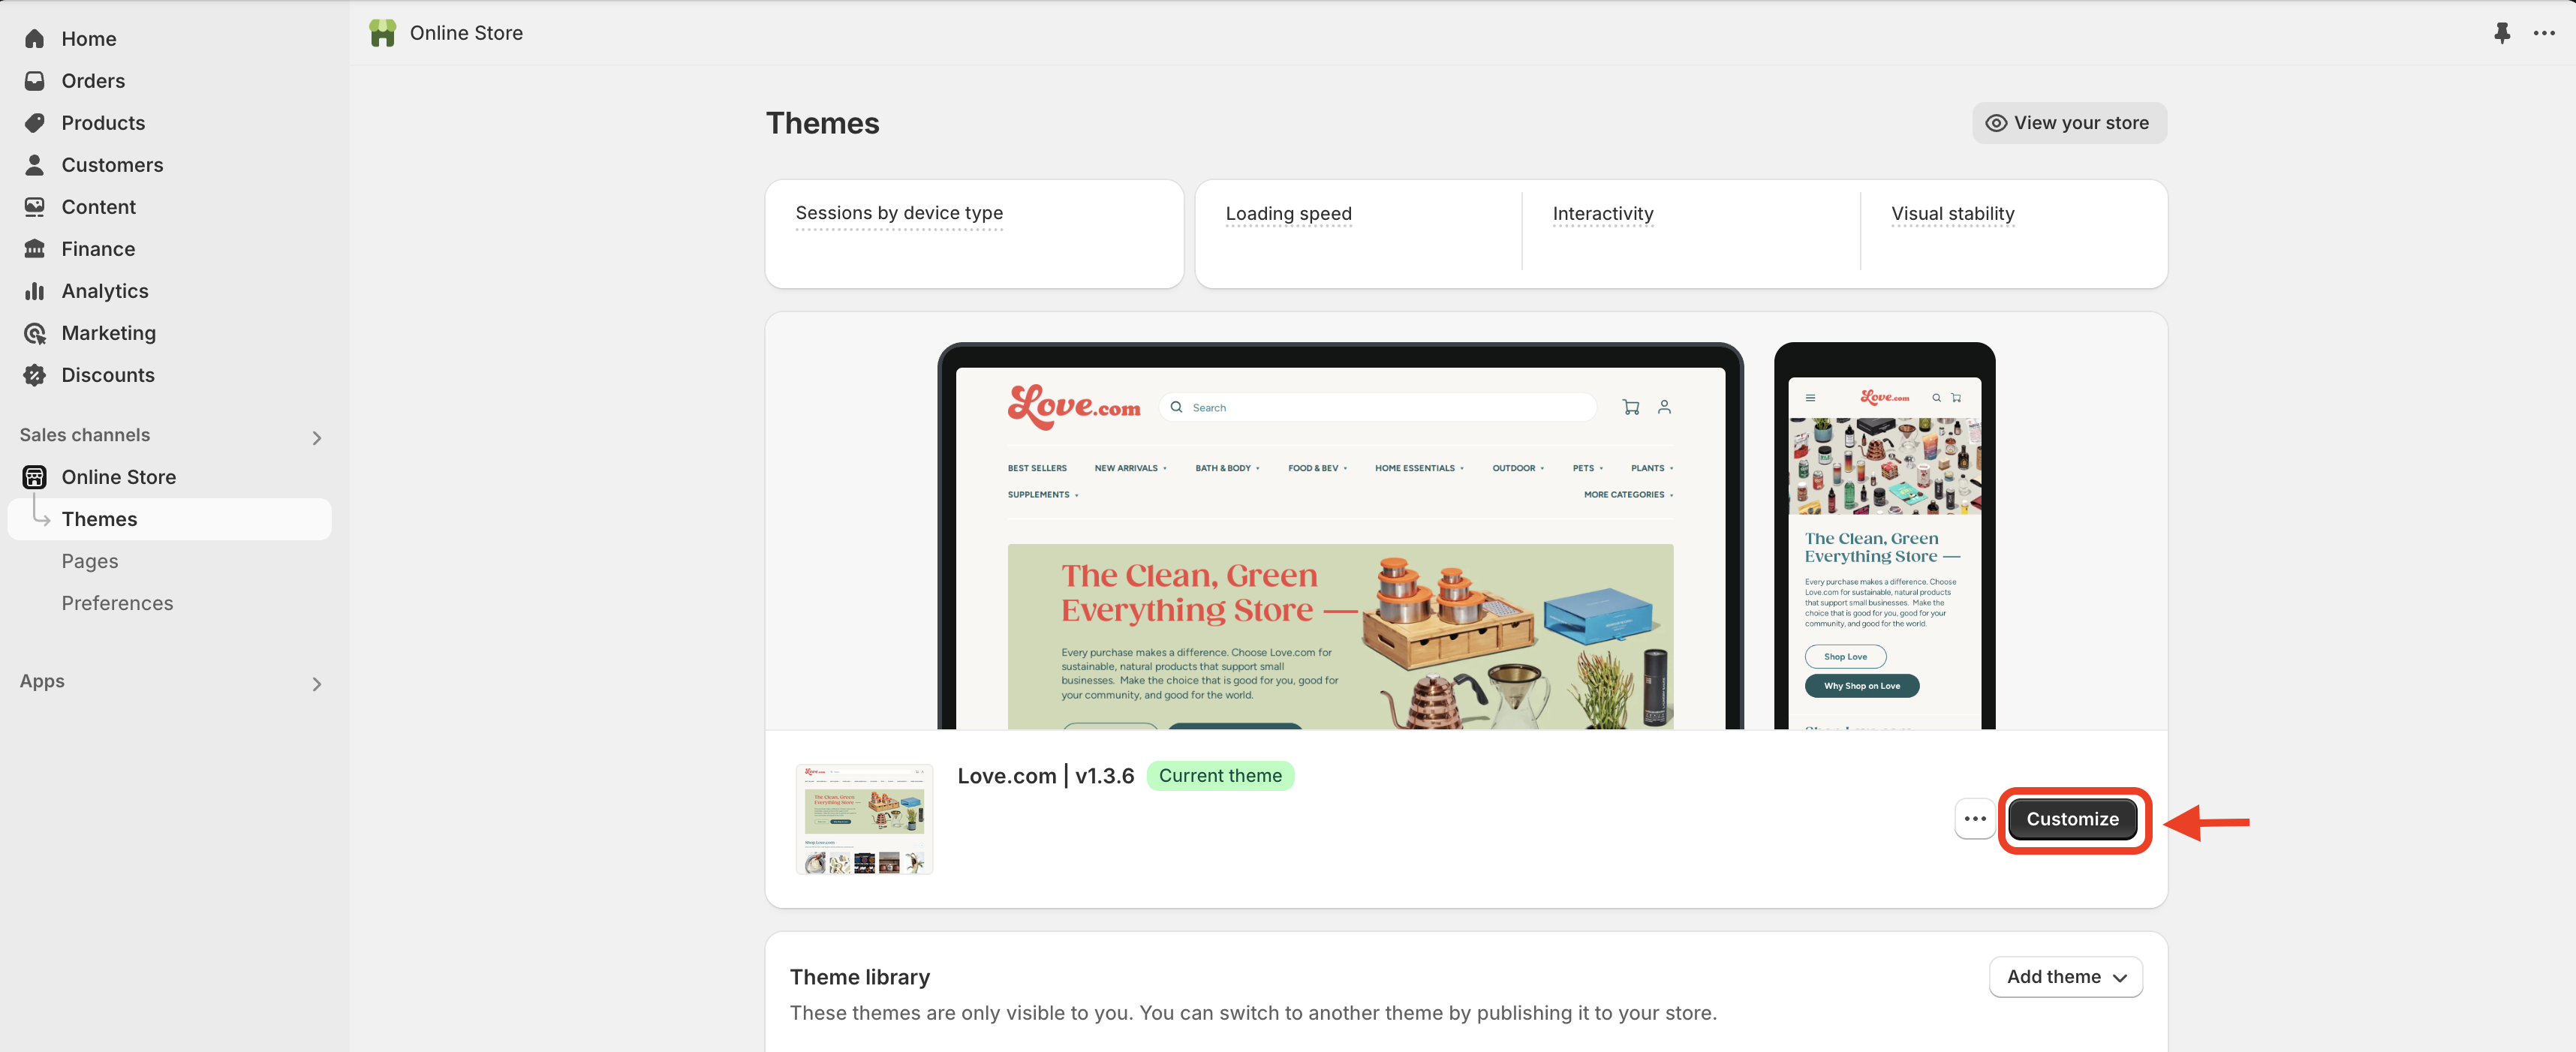
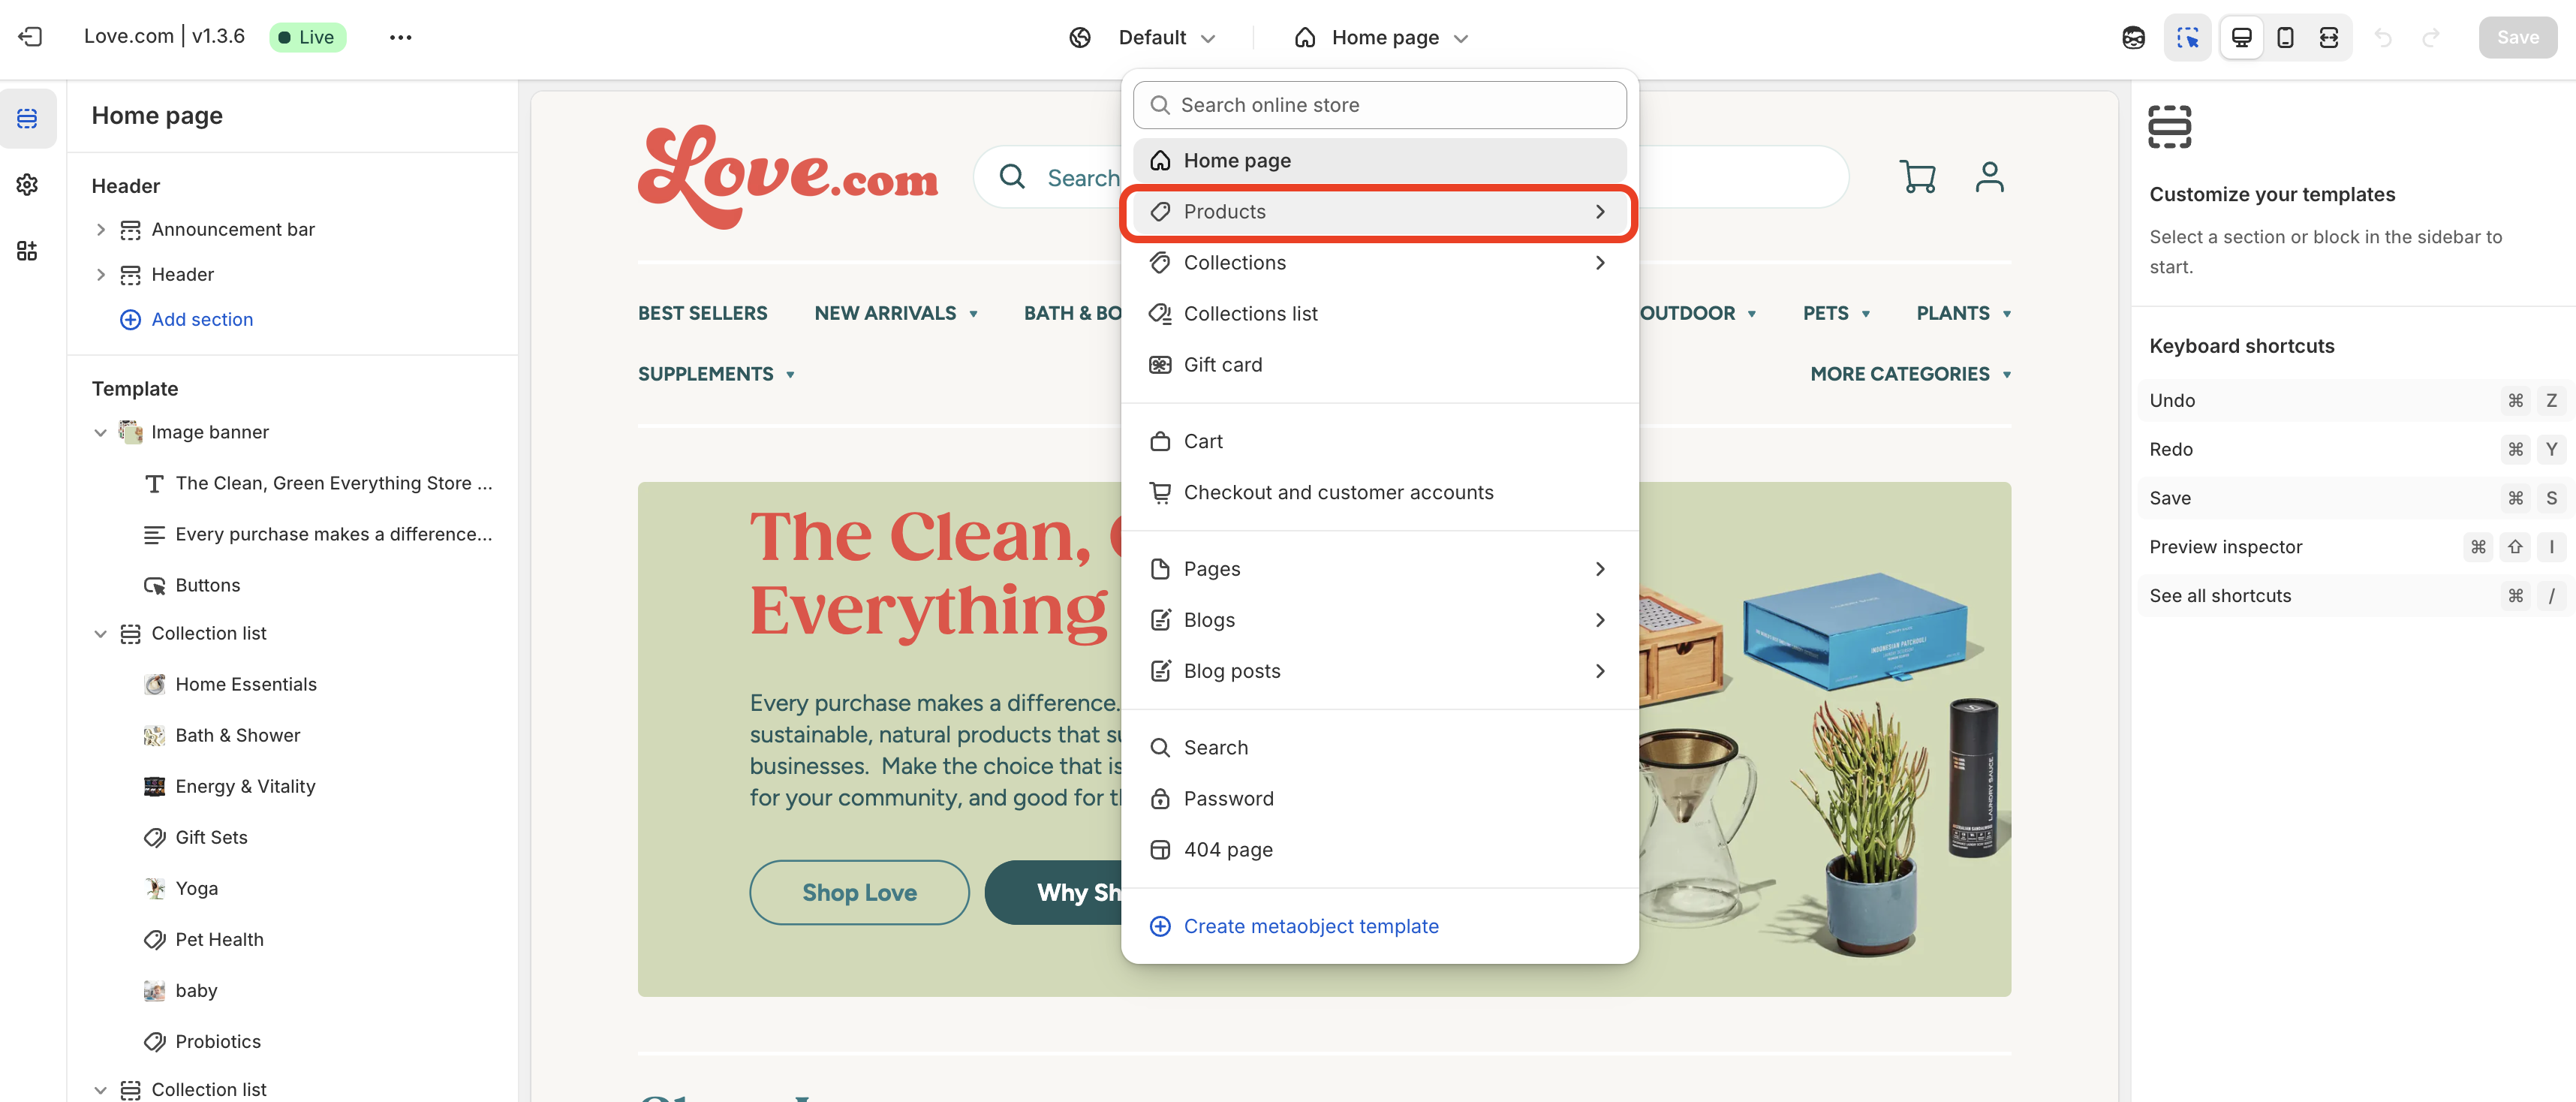
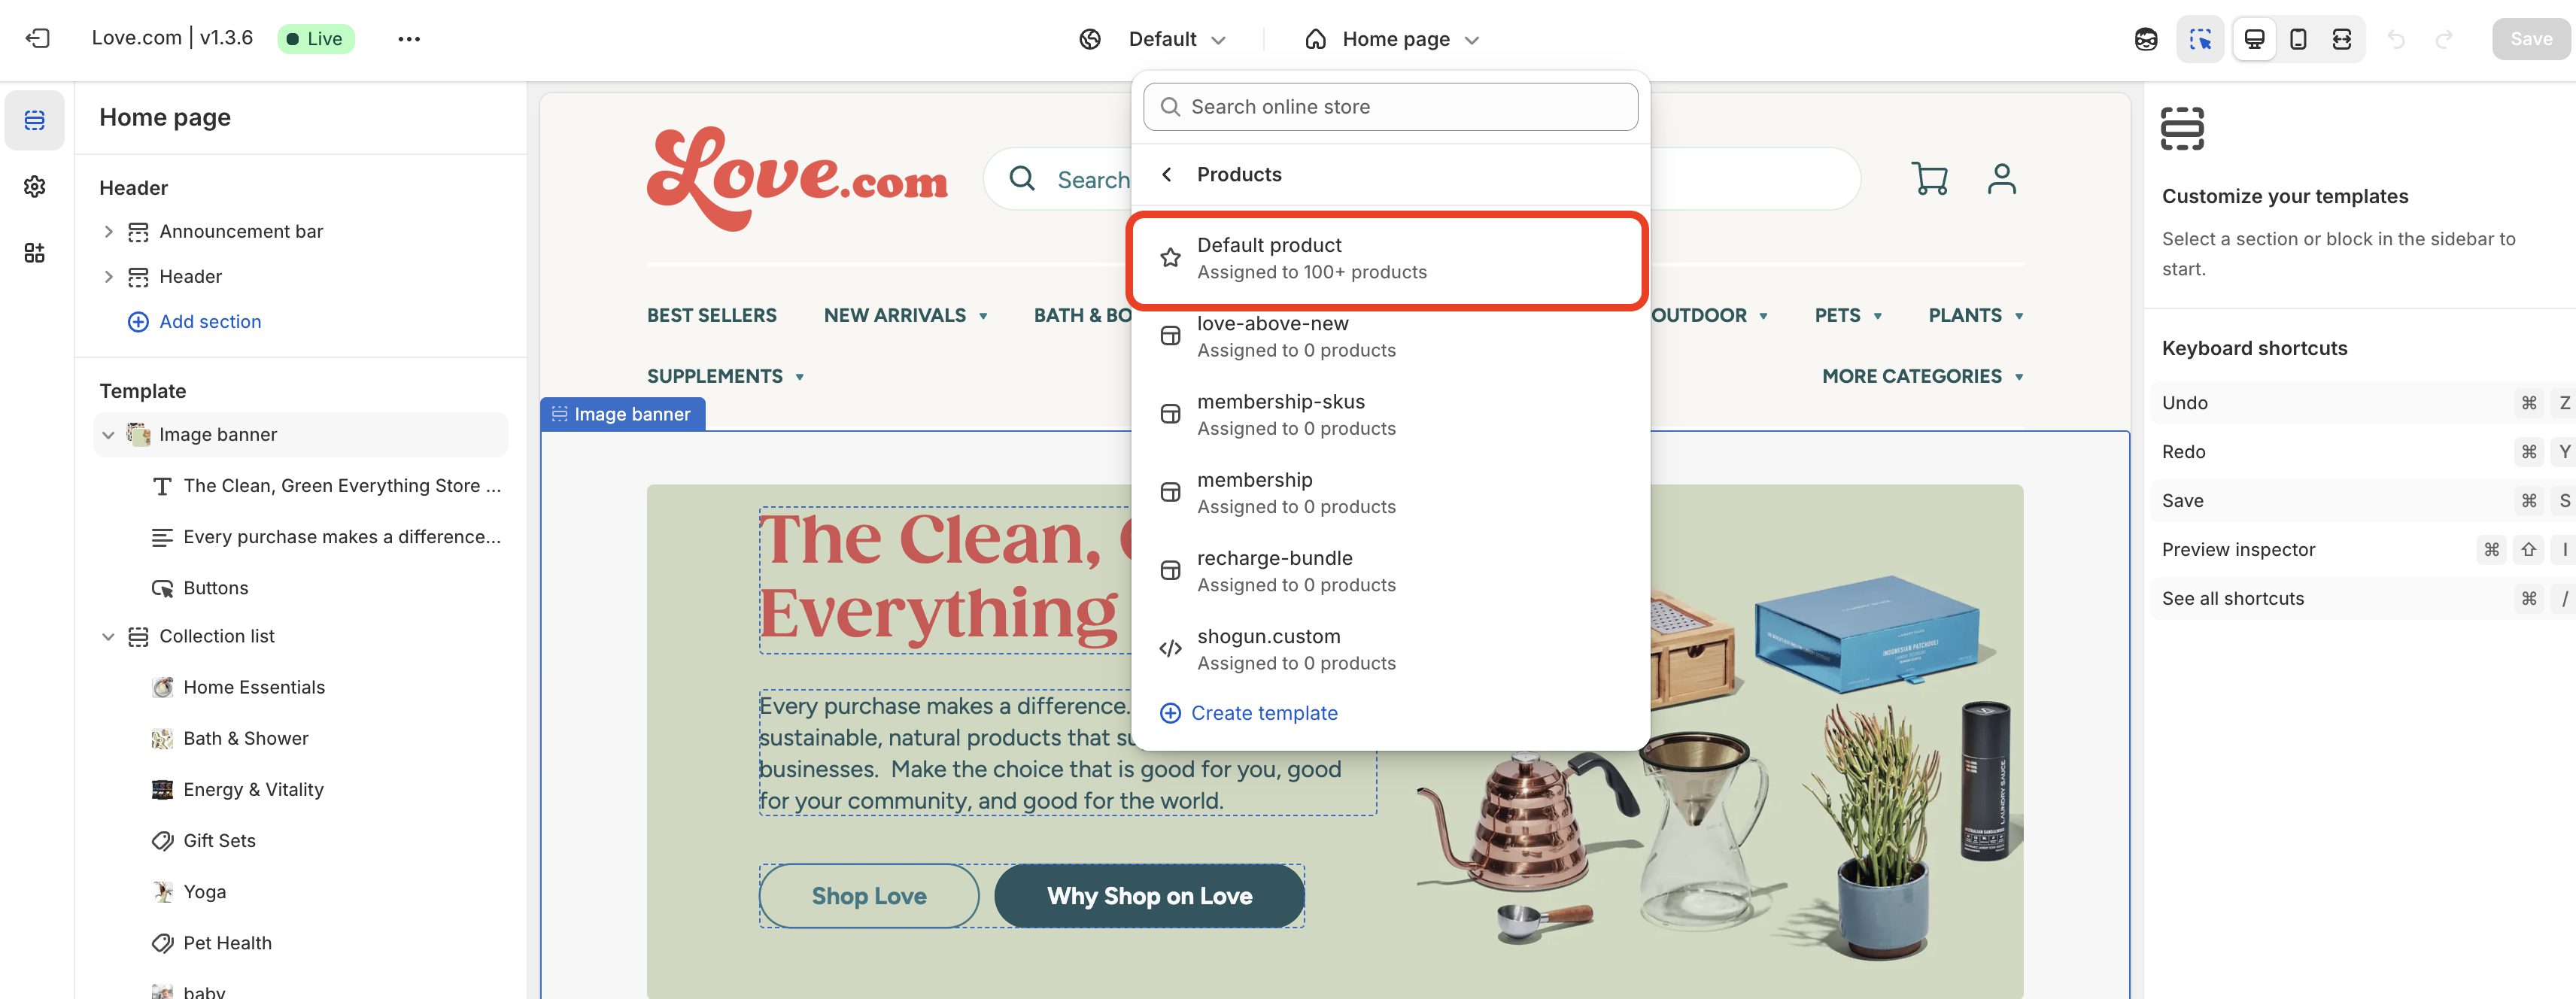
- In the top navigation dropdown, select Products > Default product.
- In the left navigation, go to Template > Product information.
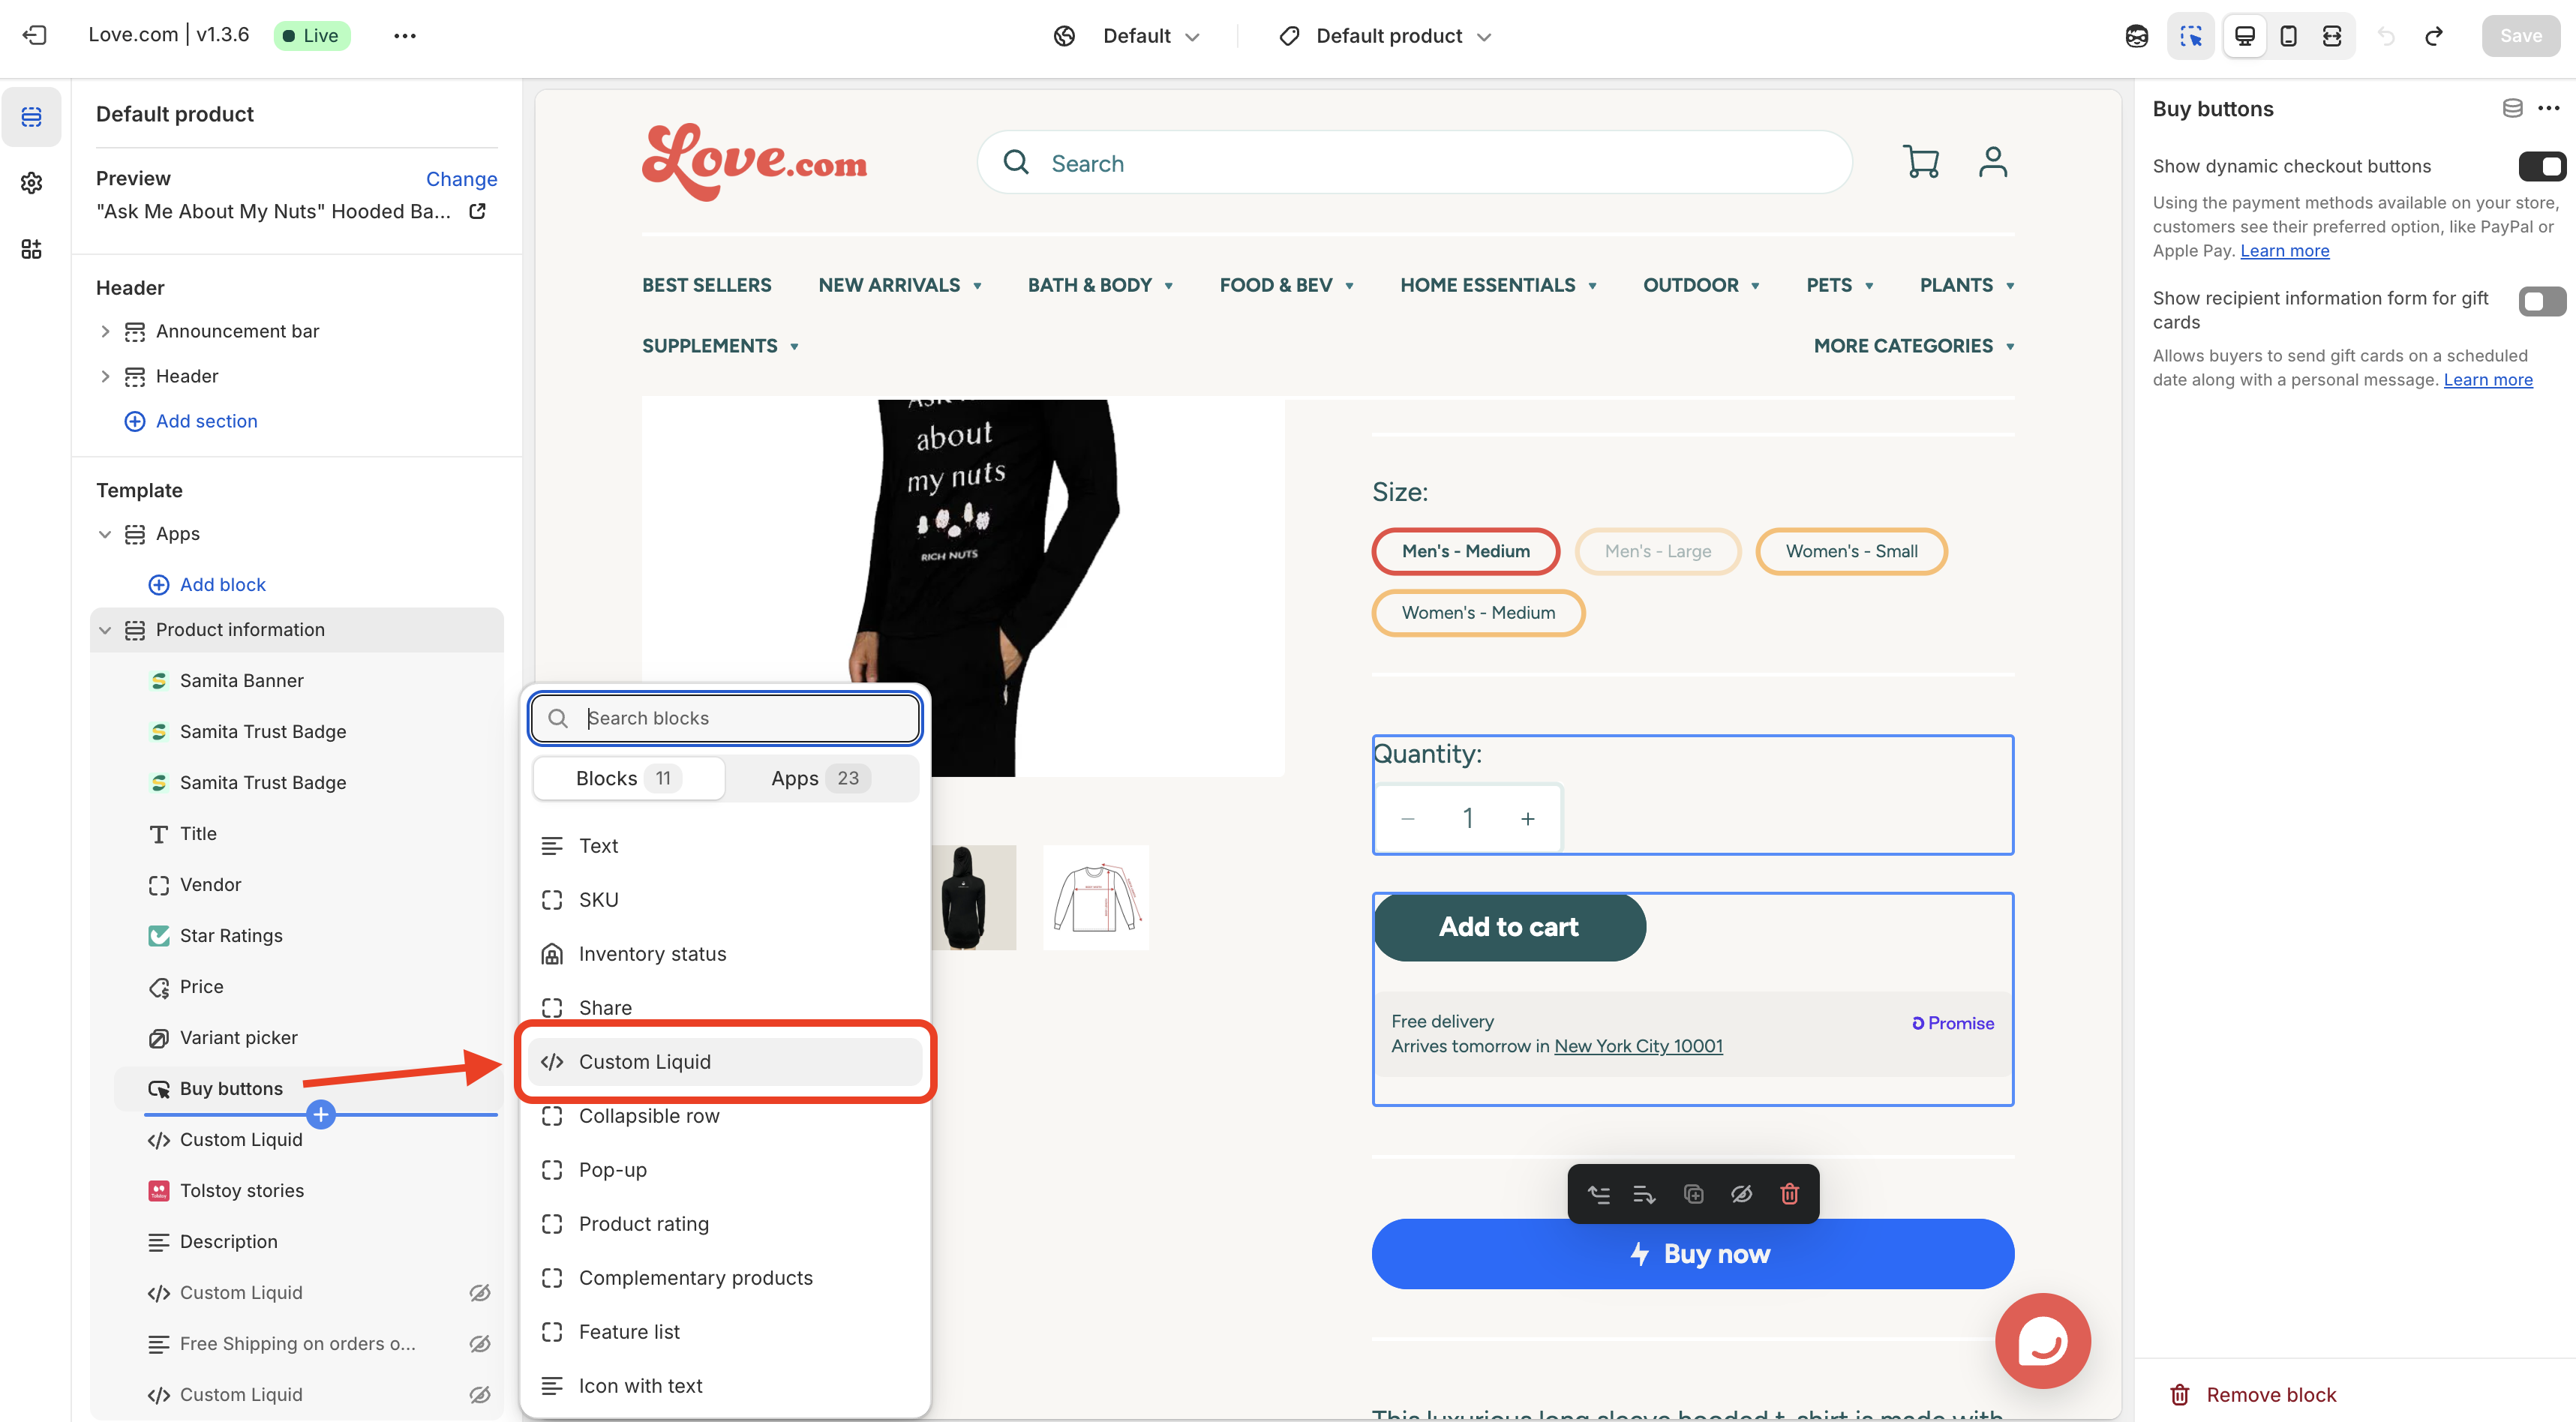
- Under Buy buttons, select Add block, then Custom Liquid.
- Paste the following into the Custom Liquid field and save.
<div class="product-form__input">
 <button data-bolt-buy-mode="buy-now" class="bolt-buy-button button button--full-width button--large">
   {% render 'bolt-icon' %}
   <span>Bolt Checkout</span>
 </button>
</div>
Test your website
-
Open your storefront and add a product to the cart.
Expected result: The Bolt button appears in the cart drawer, on the cart page, and on the product page.
-
Select the button and complete a checkout.
Expected result: The Bolt checkout link opens, and the completed order appears under Transactions in the Merchant Dashboard and as an order in Shopify.
Optional dashboard configuration
Alternative payment method configuration
- Log in to the Merchant Dashboard.
- Go to Payments and choose the payment method.
- Complete the payment method configuration.
Google Analytics / Facebook Pixel configuration
- In the Merchant Dashboard, go to Settings > Checkout.
- Select the Analytics tab.
- Enter your Google Analytics Tracking ID or Facebook Pixel ID.
- Select Save.